Creating a Plaster Cast Model for a stone sculpture.
|
|
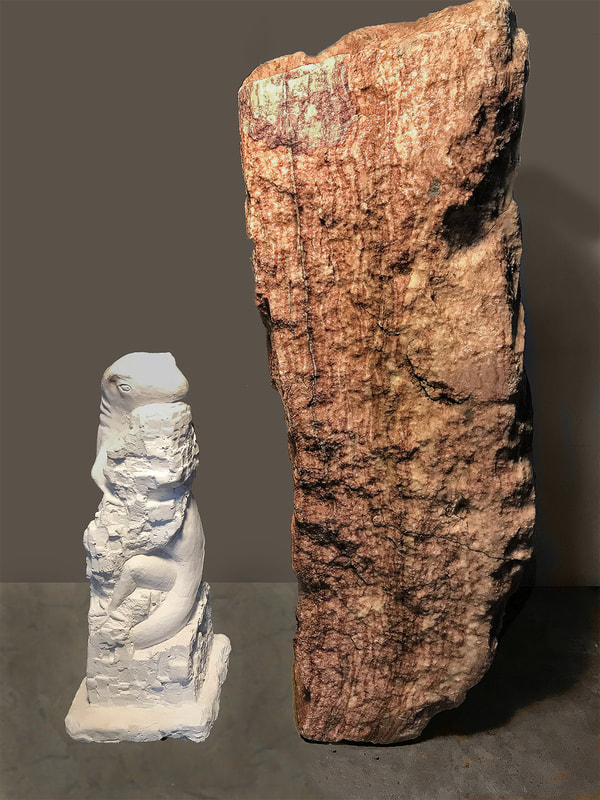
What you see in these photo's to the left is, the plaster cast of the clay model on the right and the stone in the center that I hope to carve into a lizard coming out of or in and around a stone. I made a clay model, I cast it in plaster and I hope to carve the stone in the image of the model. The idea came simply, I went into an art gallery, saw a salmon carved in stone standing upright, on it's tail with exaggerated features and I said to myself "I've got to have one of those". Purchasing out of the question, financially, but making my own sounds like great fun.
This process can be referred to as a double loss method. You lose the model and you lose the mold of the model. It's a process in which classically trained artist, such as Rodin would employ. This is my first attempt, I've just started carving the stone and the plaster model has proved it's worth immediately, so it won't be the last time I do this. |
The mold begins with a clay modelOne might ask what's the correlation between a salmon and a lizard? It's the vertical stone. Stone is beautiful, it has presence, solidity. It will rest on the floor, much to my wife's dislike, for it will have to sweep around etc. And it will come to up thigh height.
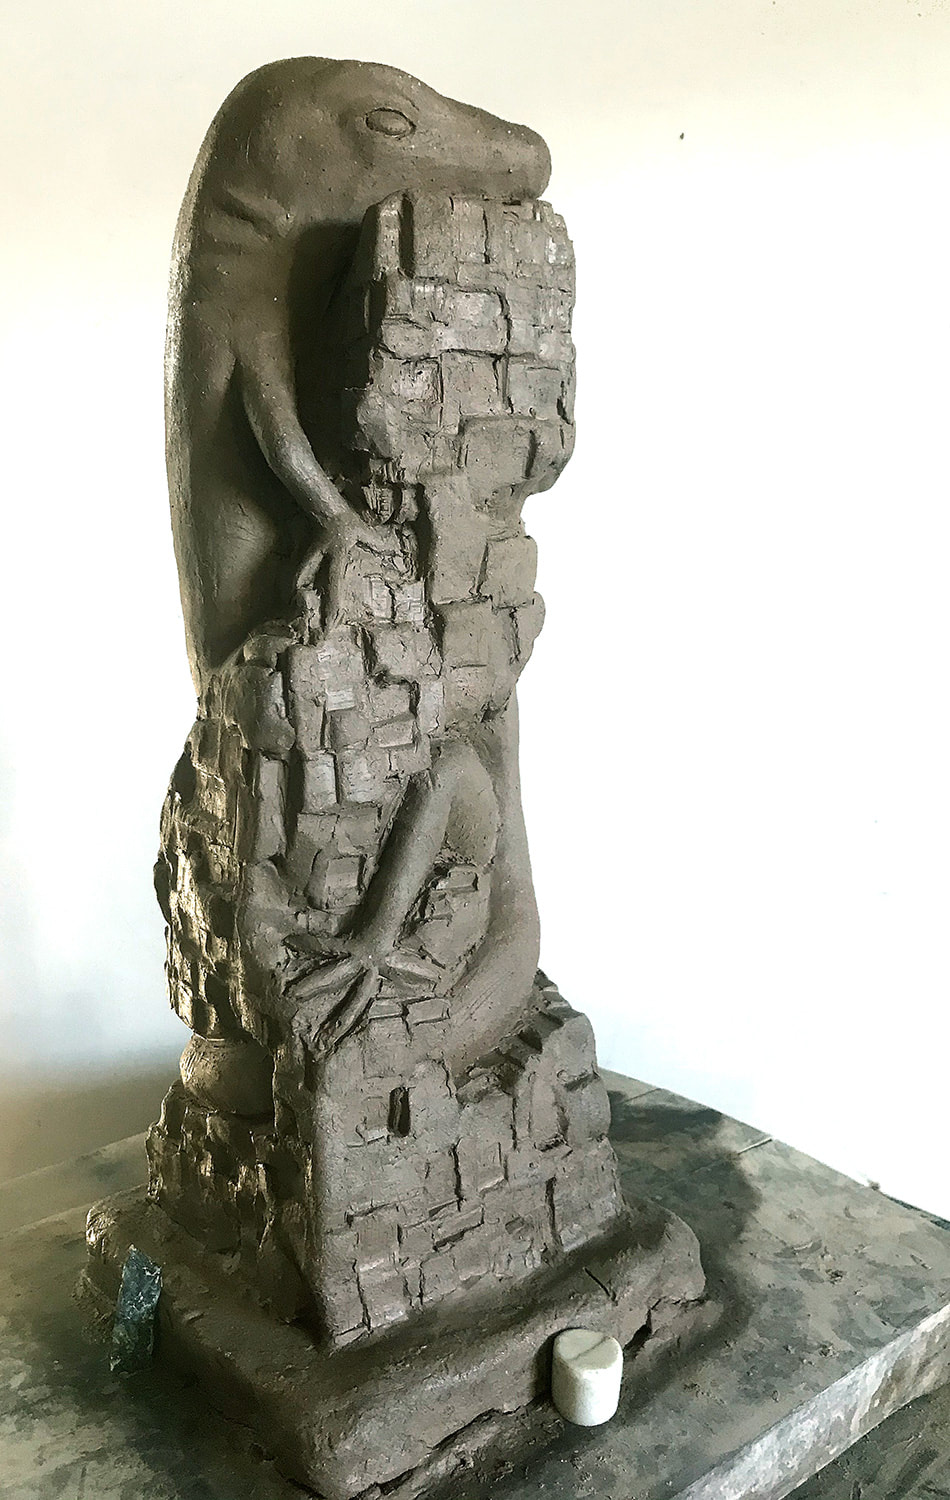
This slide show is different views of the final clay model. I took these photo's rather hastily with my phone primarily for reference. If things go south, I'd still have the pictures. Of course these pictures have been doctored up, clarified beautifully by my photographer, Marlene Barnes. She does such a wonderful job with all the photo's of my work and my website. I truly can't thank her enough. The battery, white cap and green stone were placed in the photo's, only for reference. In case the casting didn't work out, I would have something to show for my 1 1/2 - 2 years making the model. Time flies when you're having fun! I also made the model in a little different manner then I would recommend or that is normally used. For some reason I made rectangular block of clay, half the size of the piece of stone and removed clay, like carving the clay. Instead of building up the model with clay, little clay balls adding up, creating the model, as is traditionally done. |
|
|
|
The model is prepared and the plaster is applied.The first step is to divide the model in half, this will be a two piece mold, a three piece mold would be divided accordingly. I used copper pieces for the division, I have some around. Aluminum, steel will work as well. Pushed into the clay for a good purchase and with no gaps so one half of the plaster does not meld with the other.
I applied a blue colored first coat of plaster to one side. The blue color plaster is used as an indicator, that is one is getting close to the final plaster cast, go easy with the chisel. I say a blue colored plaster but what I wanted was a saturated blue plaster. A deep, deep solid blue. As we'll see, that would have been very helpful. I read books, watched videos to learn the process, I found out after I had finished the plaster model, the bluing and the source I should have used. Instead, I used food coloring. After the first coat, which you can apply with a straw to blow the plaster into all the tiny crevices and then throw the plaster on to build up the mold. I made the seams about 1 1/2 inches thick, thats a little more then the rest of the mold. The reference markings, which I kept throughout the process all the way to the final plaster piece, show their importance here because once the plaster starts o build up I begin to lose the model orientation. I thought this to be important at a later date when I started to chip away at the plaster that holds the model. When the plaster is built up enough I added metal pipe to strengthen the casting plaster mold. Once dry I removed the copper pieces and cut indentations in the flat half of the mold where the copper pieces were as a way to correctly align the two halves of the mold for the final pour. I coated this face with clay slip ( very watered down clay ) before repeating the process on the second half. First coat with blue plaster and build up as before. At the end is the mold complete with support and the blue seam line. |
The mold, once hardened, must be opened, cleaned out rejoined and poured.The separating of the mold went quite smoothly, a little nerve racking, don't pry to hard nor too fast and I was thankful for the metal pipes for their support. Inside is a bluish clay lizard and rock with paper stuffing and an aluminum armature. All removed, leaving some pretty cool photo's. Get the light right and you can't tell which is proud and which is receding.
Looking closely you can see the registration holes and protrusions and that in taking apart the mold I broke one or two off. It's a learning thing, mark on the outside where those location marks are so you don't dig the separating chisel to deep. I coated both halves several times with Murphy's Oil Soap, rejoined the two halves closing the seam and making the mold one piece. This creates the pour hole and it is filled with a very wet plaster so to help fill all the crevices that were first filled with blowing the plaster thru a straw at the beginning with the blue plaster. Very wet plaster swishing it around, draining it out and repeating. I've read that you can stop adding plaster once the walls of the model are about 1 inch thick. I saw on a video, filling the entire mold, as I have done here. |
|
|
|
The final plaster model is revealed.This was so so .......so very difficult for me. Removing the bars, no big deal, start to chip away, I still have my reference spots of the battery, cap and rock and my photo's but then I am chipping white plaster from white plaster how thick did I make the mold? I was in tears, had there been a sludge hammer nearby I would have smashed the whole thing, I hated it, it was stupid anyway!
I owe my life many times over to my wife. She has saved me time and time again. Two days later, talked and soothed down I would chip a little until I'd get frustrated close to the point of destruction, walk away and resume another day. It took about a week before I started to see clearly what was happening. And then it was so joyous, beautiful, my goodness - the swings. In one of the photo's you can see I nice big section of the mold and it's reverse on the model. Not many chips like that but some. I did some simple repairs for chisel hits gone awry. I painted the rock part to visually separate the lizard from the rock. This will help to see from a distance while I am carving the stone. |